Internet is widely used today to perform many routine tasks. Internet is a worldwide network. Each device is assigned a unique IP address to identify it uniquely over the internet. Local networks are also created to share resources like the internet, printer, etc.
Local networks are created in two ways: assigning a static IP to each computer and configuring a DHCP server to assign a dynamic IP address to each computer within a specific range. Also, sometimes two computers have the same IP address in a network.
Therefore, the two computers can not communicate within the network, and an error message occurs saying there is an IP address conflict on the network. In this article, we will explain how to resolve IP address conflict on windows based PC so that we can access the internet or another network without any error or issue.
Content
Steps To Resolve IP Address Conflict On Windows.
Some common reason (scenarios) for IP address conflicts are :
- One PC is assigned a static IP address, which is conflicting with the DHCP server’s range.
- Two different PC are assigned the same static IP address.
- Configure two or more DHCP servers, and their range is conflicting with each other.
To Resolve IP Conflicts :
- First of all, restart your computer; this will normally solve the problem if the IP address is assigned through DHCP server.
2. For static IP, use the following method to configure the new static IP address.
The first and second scenarios’ solution is to change the static IP address, which is conflicting with the DHCP range or other static IP address.
Also Check:- How To Connect Two Laptop Using LAN Network
Steps To Reconfigure Static IP Address
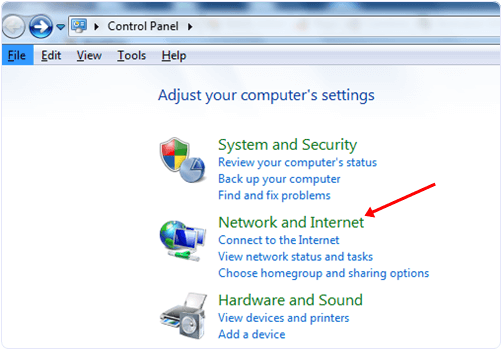
- Click on the start menu and type the control panel in the search bar.
 2. In the control panel, click on the network and Internet
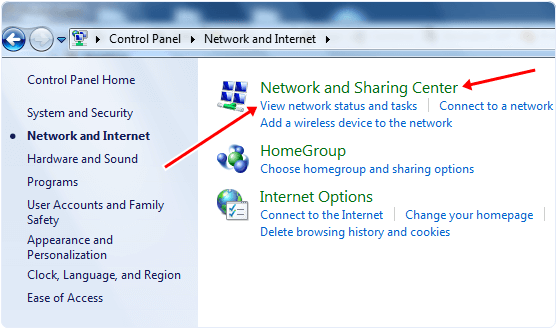
 3. Now, the network and sharing center window will appear.
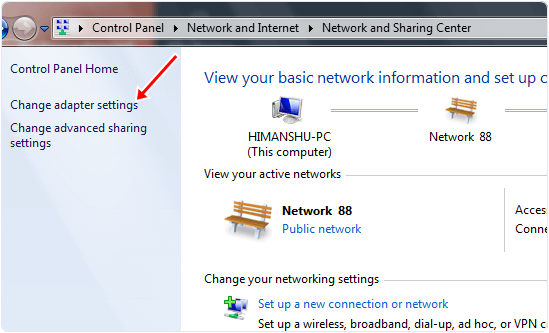
 4. On the left sidebar of the windows, click on the change adapter setting option.
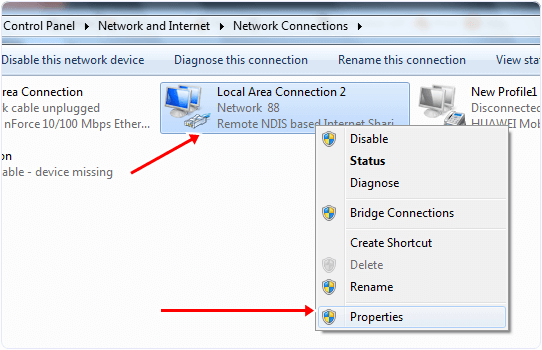
 5. Now, you will see all adapters in your network.
6. Right-click on the adapter that you are currently using for internet connection and select its properties.
 7. Now, a dialog will appear; in the networking tab, click on the Internet protocol version 4 and click on its properties.
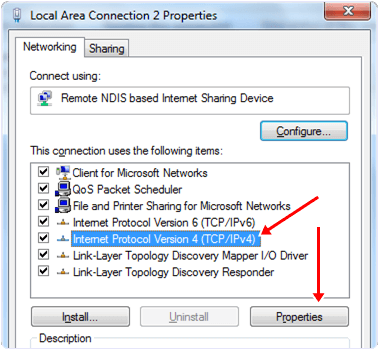 8. In the properties we can easily pick the IP address from the DHCP server or fill the static IP address.
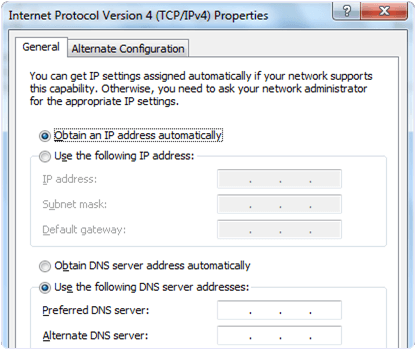 9. After changing your IP address, restart your computer, and IP address conflicts are resolved after this.
Method 2:- Release And Renew IP Address.
To release the current IP address, follow the steps below.
- Click on the start menu type the command prompt in the search bar and hit enter.
- Now type the following command on the command prompt.
Ipconfig/release
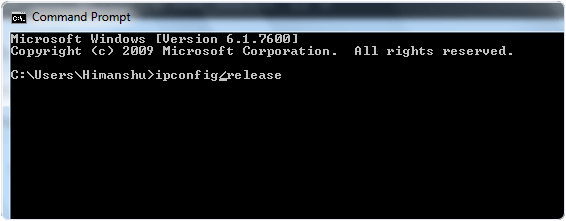 NOTE:- If your computer has a static IP address, then the operation for the above command is failed. Then we have to go for the above method to change the static IP address.
3. After this command, type the following command to renew your IP address.
Ipconfig/renew
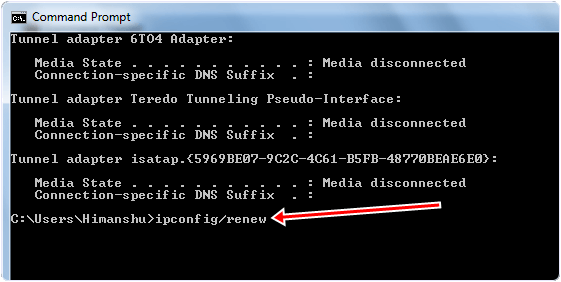 4. After that, our computer IP address is renewed with a new IP from the DHCP server, which will resolve the IP address conflicts.
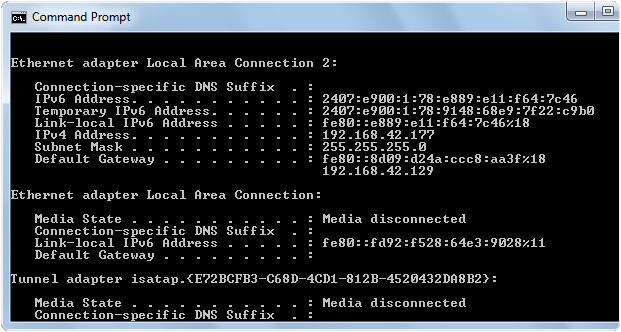
Now IP Address Conflicts should have been resolved.
In conclusion, we hope that this simple guide on Resolving IP address conflict on a Windows PC network helps you in clearing your problem. Please share this article with your friends if you find this useful. For any assistance, please feel free to write to us in the comment section below.
