If you have ever rooted your Android device, then you should be familiar with two things: Superuser and BusyBox. Superuser is software that manages permissions. And, lets you decide which app gets approval and which doesn’t.
On the other hand, Busybox is software that allows you or programs to perform the task on your phone with the use of Linux commands. It is made of a combination of many “simplified” Unix tools into a single executable file. It can run in various environments.
Also, Busybox provides some functions that you won’t have without it. Many software, especially rooted software such as Titanium Backup, require the busy box to perform some tasks. BusyBox for Android offers an intelligent code editor with syntax highlighting for multiple languages.
Must Read- Best Android Apps For Computer Geeks
Content
Why Do You Need Busybox?
Most software that wants to use root access needs BusyBox to function correctly. BusyBox is pretty useful for developers or power users because it provides many utilities that Android’s Toolbox does not.
Do your Android phone needs root access to install Busybox?
No, an Android smartphone doesn’t need root access to install or use BusyBox. It can run in a terminal emulator or from an ADB shell.
However, if you want to install and symlink BusyBox on your system path, then root access is a must.
How To Install Busybox?
The process to install BusyBox is straightforward and easy. You will only need a bunch of things listed below.
Things you will need:
- Rooted Android device.
- Busybox Installer apk.
- Proper Internet Connectivity
Now you need to follow the steps below to install BusyBox on your Android smartphone.
1. Download and install BusyBox by clicking on Download.
2. Open the application instantly after the installation is complete.
3. Now it will ask for Superuser access. Then, tap at the “Grant” button on this popup.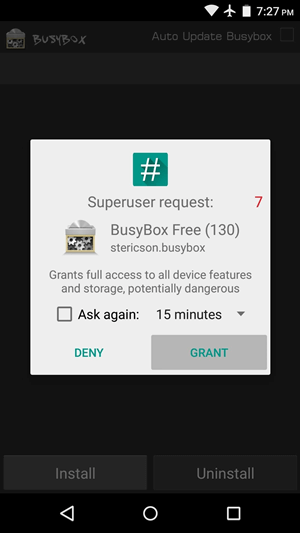
4. Now, dismiss the message which appears next to head into the main application menu.
5. It will automatically download binaries and install them.
6. Click on the “Install” button which is in the bottom-left corner to install the BusyBox commands.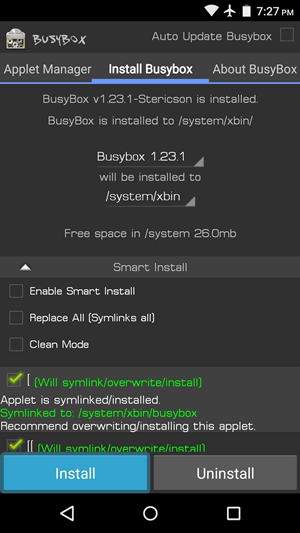
7. After just a few seconds, it will show you a message that the commands are successfully installed on the device.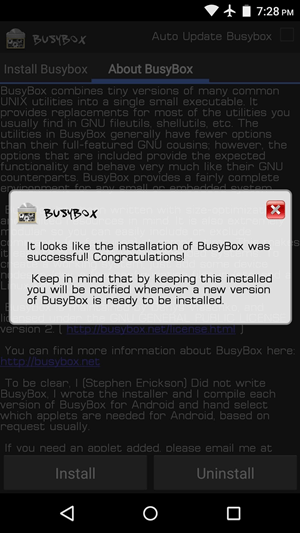
And that’s all that you have to do. Now, you can run more complex root mods that require the BusyBox commands to be installed, so your rooted device just got a bit more robust.
Verdict.
Hence, this was the whole process through which you can easily install BusyBox. Once you have installed it then you will be able to perform the purpose for which you have installed it. The method is working as we have tested it ourselves before presenting it to you. We hope that you liked the article. And, you will surely share it with your friends too. We will be back again with another one soon. Until then, it’s GoodBye from our side.